Team Management Module
1. Overview
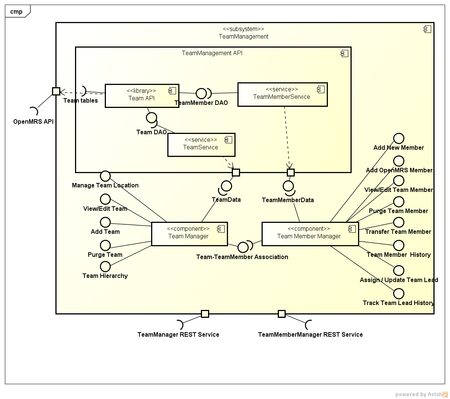
Team Management module is an OpenMRS module developed by Interactive Health Solutions for OpenSRP project that helps the user to manage multiple teams of a project. It allows users to add/edit/delete team and team members. Each team has only one team lead. User can easily transfer member to another team, make new team lead, view members/teams, view team/team members history.
The features are different for different users and the functionality varies according to user roles. Furthermore, it provides data via REST calls.
2. Requirements
2.1 Install JDK (Java Development Kit) 6.0 or higher:
Download and install from here. You need to select the correct JDK for windows depending on your windows operating system (32-bit or 64-bit). You don’t need to make any changes to the default settings.
2.2 Install Apache Tomcat 7.0:
Download and install from here. Choose '32-bit/64-bit Windows Service Installer' in Binary Distributions.
2.3 Install OpenMRS (Open Medical Record System) 1.9.2 or higher:
Download and install OpenMRS from here. Place the war file in the “webapps” folder in tomcat directory. Run tomcat and then type “localhost:8080/openmrs” and the setup will begin. Let the defaults be as they are and proceed with the setup. After finishing the setup, type “localhost:8080/openmrs”. Type “admin” as username and “Admin123” as password.
2.4 Required Modules
Add the following modules from OpenMRS Module Repository
- OpenMRS UI Framework 3.3.2
- Rest Web Services 2.11.dae2e2
Then add the Team Management module by adding the .omod file provided to you.
2.5 Required tables in database
Import the tables “team”, “team_member”, “team_lead” and “member_location” in your OpenMRS schema. These will be provided to you in a single sql file.
3 Using Team Management Module
3.1 Navigating to main page
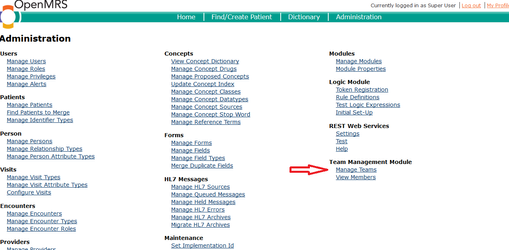
After logging in to OpenMRS, go to Administration. After that click on “Manage Teams” under the heading “Team Management Module”.
3.2 Team
3.2.1 Add Team
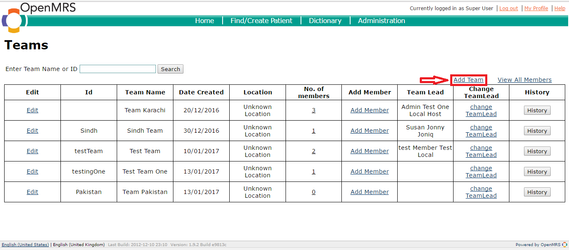
After clicking on “Manage Teams”, you’ll be redirected to this page. By clicking on “Add Team” you’ll be redirected to the page to add team. Same page is used for adding members too but it will be discussed later.
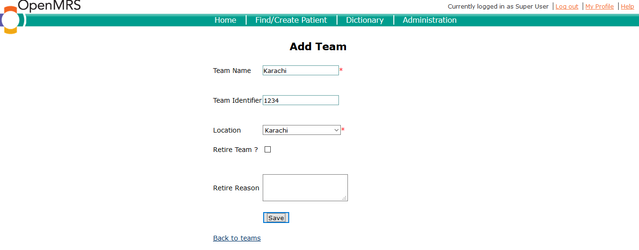
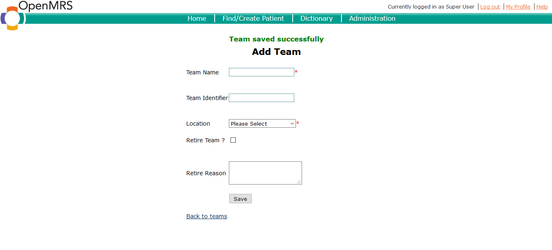
After clicking on “Add Team”, you will be redirected to the page below.
Fill in the data and click on “Save”. The retire team option can be used while adding the team if the module is integrated in the middle of project and some of the teams were there which are now retired. After clicking on “Save”, you would see the success message in green right above the “Add Team” heading. Also, the page is ready to add another team too. You can go to the team list again by clicking “Back to teams”.
3.2.2 Editing Team
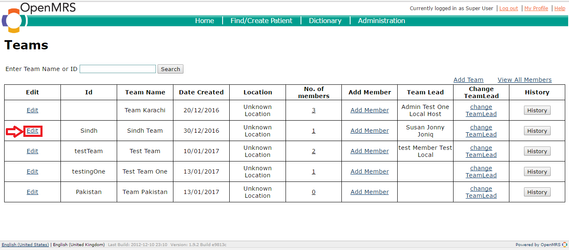
To edit a team, click on the edit button on main page of the module. The location of button is shown below. You should click on the button corresponding to the team you want to edit.
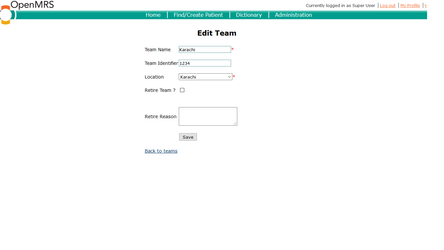
After clicking on this button, you’ll be redirected to the page given below.
The data will already be entered there of the team. You just need to make the changes and save it. Changes would be reflected there and saved.
3.2.3 Viewing Team History
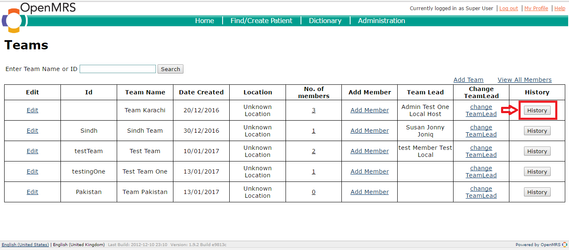
To view team history, click on the “History” button provided against each team.
Team Member History will be display as a popup as display below:
3.3 Member
3.3.1 Add Member
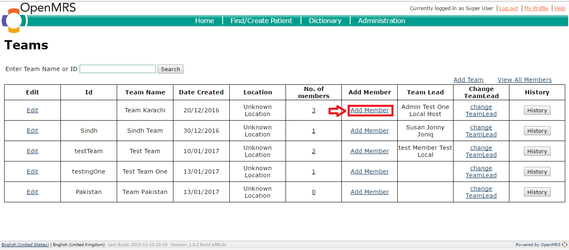
To add a member to a team, click on “Add Member” corresponding to that team.
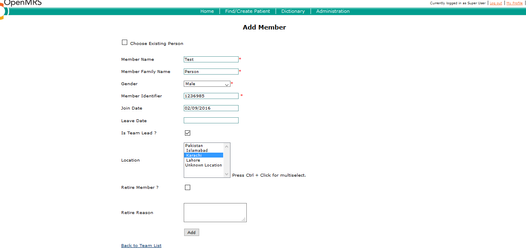
After clicking it, you’ll be redirected to a page to enter details of team member.
Click on “Add” to add member. The same form will be there for you to enter other members.
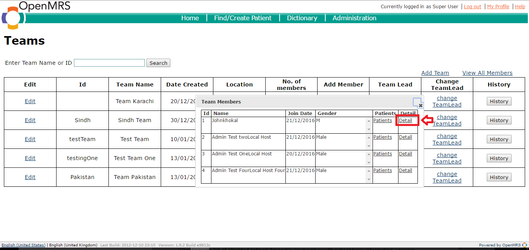
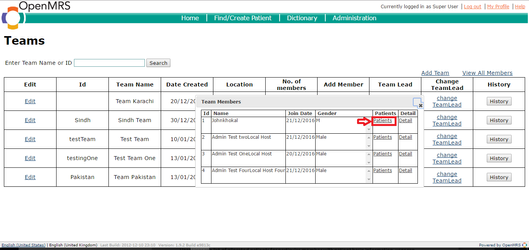
To see the members that you’ve just added, go to the main page again and you’d see the count of members equivalent to the members you added. Click on the number to view the members. Team Member will be display as a popup;
User can get further detail by clicking on “detail” link at every row as display below:
After clicking, user will be redirected detail page for detail as shown below:
3.3.2 Editing Member
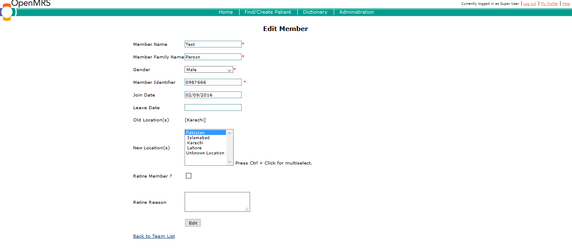
To edit a member, click on the edit button while viewing the list of members.
The page will redirect you to the form similar to the page you were taken to for adding member but this time with form pre-filled with the data of member. After editing, click on “Edit” to save the changes. The page remains there though to make further changes if something was left or something was mistakenly changed.
4. Member Patient Mapping
On team Member Pop-Up user will redirect to page where he/she can see patients for each Member of team by clicking “Patients” link.
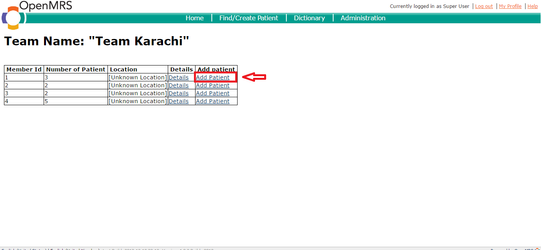
Here User can see no. of patient that enrolled or register for each Member of team as shown below:
User can also add Patient. First he/she has to click on “Add Patient” link on very last column(see below screenshot)
Here User Input Patient name/id (Patient Must be registered otherwise it will give exception), reason and status and press "Add Patient" button to add.
After clicking “Add Patient” button you will redirect to page as seen below figure:
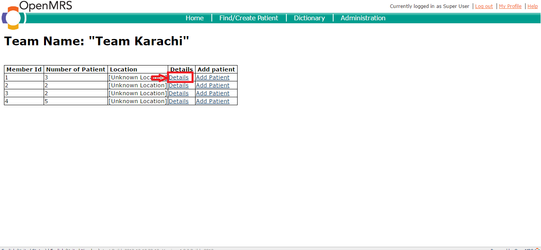
For complete patient list just click on “Details” link as shown in below figure:
After Clicking detail button user will redirect to page where you will see list of patient as shown in below figure:
user can un-Assign the patient if he/she wants to by click Un-Assign button on last column(see above screenshot)
